At this point I had all my raw materials so to speak. Here is the 4 images I ended up using...


And here is the final product and the steps I took to create it...


Step 2: Selected the crop tool and chose the 5 inches x 5 inches size (to give a 1:1 ratio). I then draw the area I wanted to crop. Then using 'free transform' I rotated the box, moved it around and adjusted the size until I was happy with the area selected.
 Step 3: I pressed enter to see what the crop would look like. I repeated the process of cropping again because I felt that it wasn't quite right (rotation was a bit off). I went back using the 'history' list on the right side of the screen. I did this until I was happy with the crop. After cropping used 'free transform' to horizontally flip the image (make it into a mirror image)...You'll see why in a sec.
 Step 4: I then dragged and dropped the image on the first image. I wanted this photograph to be the bottom right quarter because I felt it lined up nicely with my hair from the top right quarter so I used a mirror image. Using 'free transform' again, I re-sized it and moved it around until the nose was lined up well. I felt the nose would be a good natural 'centre' for the photograph

Step 5: I repeated steps 2-4 (excluding the mirror image part) for the next photograph. For this photograph I had to ensure the top of the head and the eyes was also more or less lined up.

Step 6: Surprise, surprise...I did the same with the fourth and final image. I found this one particularly difficult to line up because it was a photograph of me as a baby so my face was comparatively quite small. It meant that I had to keep going back and cropping more and more 'body' in.

Step 7: Finally, I adjusted the colour colour balance in the top right image and the bottom image. I selected the layer I wanted to adjust, added an 'adjustment layer', selected the 'clipping layer' option to ensure the adjustment layer 'clipped onto' (only affected) the selected layer. For the top right image I reduced the yellow and added a bit of blue and for the bottom left I reduced the green.
I feel I have accomplished what it was I set out to accomplish however a huge criticism I have of my final image is that each skin tone is completely different due to different cameras, the fact it was film and each was developed separately, and the scanning probably didn't help! If I had a broader knowledge of PS I would be able to adjust the skin tones to match and still make it look natural. However when I showed it to others some agreed with my criticism and some said the fact that each image has a different tone makes it more interesting and were surprised when they found out that I didn't do it on purpose so maybe at the end of the day its a personal preference thing...my preference, however, is still matching tones!!!


And here is the final product and the steps I took to create it...


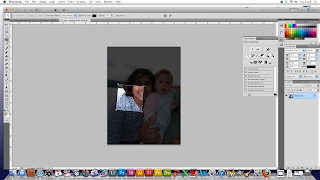
Step 1: Opened image in Photoshop (PS). Before beginning I made sure the layers toolbar and the history toolbar were open/extended. I then opened the second image that I would crop.

Step 2: Selected the crop tool and chose the 5 inches x 5 inches size (to give a 1:1 ratio). I then draw the area I wanted to crop. Then using 'free transform' I rotated the box, moved it around and adjusted the size until I was happy with the area selected.


Step 5: I repeated steps 2-4 (excluding the mirror image part) for the next photograph. For this photograph I had to ensure the top of the head and the eyes was also more or less lined up.

Step 6: Surprise, surprise...I did the same with the fourth and final image. I found this one particularly difficult to line up because it was a photograph of me as a baby so my face was comparatively quite small. It meant that I had to keep going back and cropping more and more 'body' in.

Step 7: Finally, I adjusted the colour colour balance in the top right image and the bottom image. I selected the layer I wanted to adjust, added an 'adjustment layer', selected the 'clipping layer' option to ensure the adjustment layer 'clipped onto' (only affected) the selected layer. For the top right image I reduced the yellow and added a bit of blue and for the bottom left I reduced the green.
I feel I have accomplished what it was I set out to accomplish however a huge criticism I have of my final image is that each skin tone is completely different due to different cameras, the fact it was film and each was developed separately, and the scanning probably didn't help! If I had a broader knowledge of PS I would be able to adjust the skin tones to match and still make it look natural. However when I showed it to others some agreed with my criticism and some said the fact that each image has a different tone makes it more interesting and were surprised when they found out that I didn't do it on purpose so maybe at the end of the day its a personal preference thing...my preference, however, is still matching tones!!!
No comments:
Post a Comment