As part of the media unit, we had to investigate a historical process so I decided to mess around with cyanotypes. In order to do so, first I had to select an image. I chose these images I took earlier this year in Cyprus...
I then had to convert them to B&W, increase contrast then invert in PS. They were then printed on acetate. What this does is creates a 'Negative' which I would use to create my cyanotypes. Here is a scan of what the negative looked like...
Negative 1 Negative 2
Now that the negative had been created, I had to make my 'film'. Here are the steps I took...
- Create a solution using equal amounts of Ammonium Ferric Citrate and Potassium Ferricyanide.
- Using a large, flat brush, apply a layer of the solution onto the thick paper/card in straight lines across page.
- Place in a dark cabinet to dry.
When I did this the first time, I found that the layer I had applied was too thick so it ended up looking like this...
The excess started to run and the layer wasn't even. So I repeated the process but with less solution. When it dries it turns bright sunshine yellow and you have to quickly place the negative on the card/paper and fasten with a board at the back and metal clips. I then left it outside in the sunshine for about 15 minutes. I did this for both negative (simultaneously). A chemical reaction happens between then chemicals and UV light from the sun's rays that causes the areas that are clear on the negative to become dark and the parts that are black on the negative came out lighter and were the detail. When the the paper has been exposed to sunlight, it becomes a sickly green colour (see above). I then brought them back inside and rinsed them out with water to remove any excess chemicals and left them to dry. It is when you rinse them they turn blue. Here are the results...
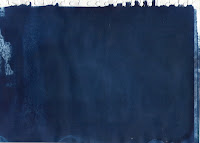
As you can see negative 1 came out stupendously wrong; I came to the conclusion there wasn't enough contrast and the detail was too fine for the cyanotype to capture so most of the paper ended up reacting, creating an almost entirely blue page! The other negative came out much better however another conclusion I came to is that I left it out too long so next time I decided to only leave it out about 10 minutes. I repeated the entire process the next sunny day I could...and here is the result (I only did it for negative 2)...
This is my final image from the investigation I did into cyanotypes. I am quite happy with the result (I can honestly say it looks better in real life it came out funny in the scanner!) and I plan on investigating further in the future perhaps with better negatives now I have an idea as to what negatives work and which don't. Also I think I still left it out a little too long (or perhaps comparatively it was just an extremely sunny day!) so that is something I need to be aware of in the future. One final thing I will say is that when I do this again, I plan on using either Hydrogen Peroxide, Lemon Juice or Vinegar because apparently it intensifies the blue which I think would be interesting to see!!!!


No comments:
Post a Comment